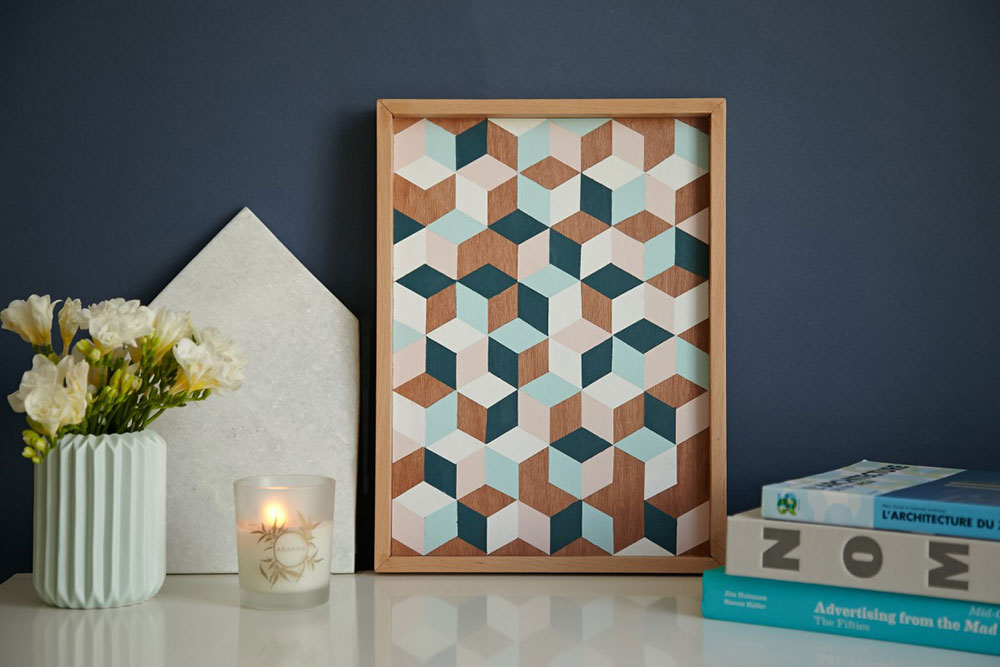
Ah, this motif, despite its austere airs, I like it. It must be said that after a few years in archi based on “cube + perspective = infinite love”, my judgment was surely a little… influenced. Let’s say it like that. However, with slightly funky colors, it is still nice to admire this pattern, right?
After searching in vain for a small plateau just basic to customize, I finally embarked on a manufacturing AZ . The result is therefore a fairly long tutorial but I can assure you, you don’t need to be an exceptional handyman to achieve it, it just takes time and a little courage! I spread the work over 4 days, so feel free to leave the project a little bit suspended to get back to it later. And besides, nothing prevents you from customizing a tray that you already have !
Regarding the paint, it is the Ressource brand that sent me some nice samples to test for this DIY: an incredible catalog of shades, perfect coverage and quick drying, they were really perfect for this tutorial.
Besides, these 100ml samples are available for sale , and believe me, with this capacity there is plenty to get you started in the mass production of painted trays.
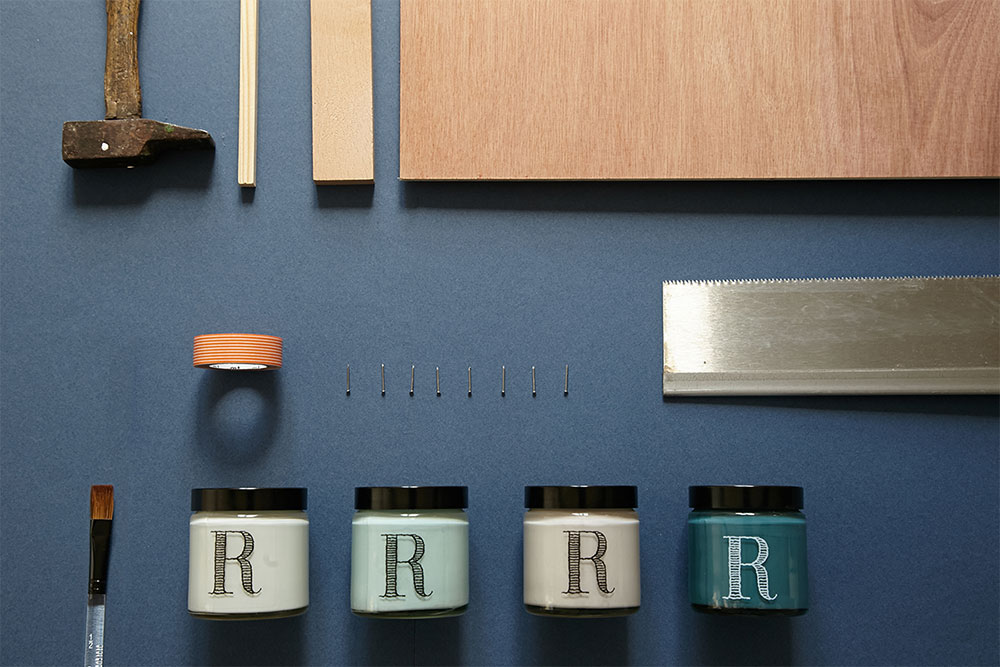
What you will need:
A piece of plywood 5mm thick (cut according to these dimensions: 36x26cm), and lightly sanded
A beech cleat with a rectangular section of 3cm by 1cm (about 2m long)
A rod with a square section of 1cm (approx. 2m) long)
A hammer and small nails of 15mm
Wood glue (important!)
A saw and a miter boxA ruler, pencil and eraser
A roller of masking tape
A brush with
4 shades of paint
A small pot of varnish.
Colors Used:
Blanc Sérénité n ° 20
Etain Blue F43
Rose Breath F25
Porte cochère RD8
Transfer the dimension of one of the 4 sides of the plate to the cleat. Cut it at 45 ° using the saw and the miter box. Repeat for each side.
Keep the cut cleats aside ( and the sawdust – yes yes ) and we move on to painting the tray!
On the longest sides (36cm), mark a first line at 1.5cm , then space the following ones by 3cm .
On the shorter sides (26cm), mark a line every 2.6cm .
Now connect the marks as shown below. For each of the longer sides, the first line joins the 6th line on the opposite side. All you have to do is use the marks to draw the following diagonals.

Advice on what to do next: take out the Doliprane.
Now erase certain lines to reveal the pattern. Do not hesitate to go over this motif again in pencil.

If you’ve made it this far, congratulations! The funniest part is now! Apply the masking tape to the places of your choice and paint with the first color. Do not wait for it to dry to remove the masking tape!

You can reuse the same pieces of masking tape at least once to paint until the result you like!

You can use a thinner brush to make any touch-ups.
Erase the remaining strokes.
Apply two coats of varnish.
Now cut the square section baguette into 4 pieces: two of about 24cm and two of about 35cm.
Glue them and nail them on the inside face and at the edge of the previously cut cleats.

You can wipe off the glue that spills out with a damp cloth.

Straighten the cleats so as to create the frame then glue the sticks.
Place the plate on the chopsticks, adjust the cleats well, possibly clean the glue that protrudes, then place weights on the plate in order to maintain a strong enough pressure. Let the glue set for at least an hour. In a small container, mix the sawdust with wood glue so as to obtain a kind of wood paste and fill in the corners.

Sand and varnish the frame.

And there you have it, a beautiful platter!

By Marie of My Rainy Days Blog